Here I will show you how to assemble the Antique Book Charms from polymer clay, which we made in the previous part of the tutorial, into a necklace and a pair of earrings.
(Click on images to enalrge)
(Click on images to enalrge)
* In this tutorial I've used beads with celtic pattern, but you can use virtually any beads you prefer. The same applies for the pearls and their color.
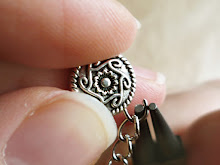
First we're going to start with the earrings. We cut about 6 cm of the chain for each earring. Then we take a ball head pin and we thread onto it one of the metal beads, preferrably the largest kind. We do this mainly out of visual considerations – it may not look so good if a tiny bead was at the bottom and larger beads were attached along the chain.
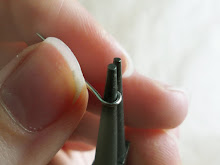
After we've threaded the bead onto the pin, we trim the wire with the cutter pliers to the desired length – about 1cm of the wire should be left. Next, we make a loop of the remaining 1 cm wire with the round nose pliers and trim any excess. Before we've closed the loop, we string one end of the 6 cm chain. Finally we lightly squeeze both ends of the loop to close it and the bottom of our earring is ready.
Next, we take a piece of not very soft wire, about 2 cm long and we make a loop at one end. Before we close the loop, we thread onto it a book charm that we made in the previous part of the tutorial. Then from the other end of the wire we thread a small metal bead or a seed bead, make a second loop and close it.
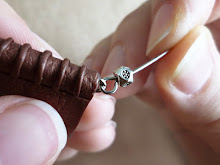
Then we take one of the earring hooks and open its loop, so that we attach the book charm with the small bead and the other end of the chain, as shown in the picture below. The exact order is important, because if the book is threaded behind the chain, it will stay behind the chain when the earring is worn. Ideally we want the book charm to be at the front.
Next we take another ball head pin and thread onto it the 3rd kind of metal beads we have (medium-sized if possible). We make a loop and attach it approximately to the middle of the chain. The position can vary depending on the length of the chain and size of the book charm. The rule I follow in this case is "whatever looks better" :D. Just make sure that no charms conceal each other entirely – you'd want all of them to be visible from various angles.
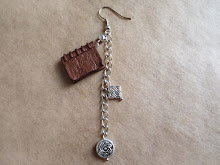
After this, the earring has started to look something like in the first picture below. Now we have only one remaining element left – the pearls. We will attach one pearl per earring – we thread it onto a ball head pin with two bead caps at each end, make a loop and attach it to the lower half of the earring chain.
We make the second earring as a mirror image of the first (I like symmetry :P) and in a similar fashion we make the pendant. The only main difference is that in making the pendant we will use two book charms instead of one, and the top end of the chain will be attached to a medium-sized jumpring, instead of an earring hook. The jumpring can be then strung onto a chain or cord of your choice.
And we're ready! You can then wear this wonderful Antique Book Charm set yourself, or give it as a present to a friend – the choice is yours :P
I hope you enjoyed this tutorial and found it helpful! See you next time. :)
Edit: You can now purchase similar Antique book jewelry in my Etsy shop :P
Stay Sunny!
Sevda (WindySunset)


No comments:
Post a Comment